Learn how to manage brands and suppliers in PrestaShop 1.7
You have a well organized store will help your customers to find the products that are looking for. It is not only important to establish the categories, add the brands and suppliers of the products will also help you in this task. You don't know how to do it? Well in this post you indicate all steps to create brands and suppliers in PrestaShop 1.7.

What are brands in PrestaShop 1.7?
The brands they were called manufacturers in previous versions of PrestaShop. Behavior of a brand is exactly the same as that of a manufacturer in PrestaShop 1.6, the only thing that has changed is the name.
If you make your own products, it is preferable that you believe your company's brand because that will help customers find what they are looking for and will bring you benefits in SEO, because the search engines will take this information as a reference. You must take into account that in the front of your tent manufacturers are listed in alphabetical order. It is not possible to change this established order. Furthermore, new brands are by default disabled. You must activate them in order that appear available in your store.
Creates a new brand in your ecommerce
To create a mark click on Catalogue > brands and suppliers and inside Access tab of brands. Once inside click on the button Add new mark or symbol + within the buttons that appear next to the list of brands... The creation form will be displayed.
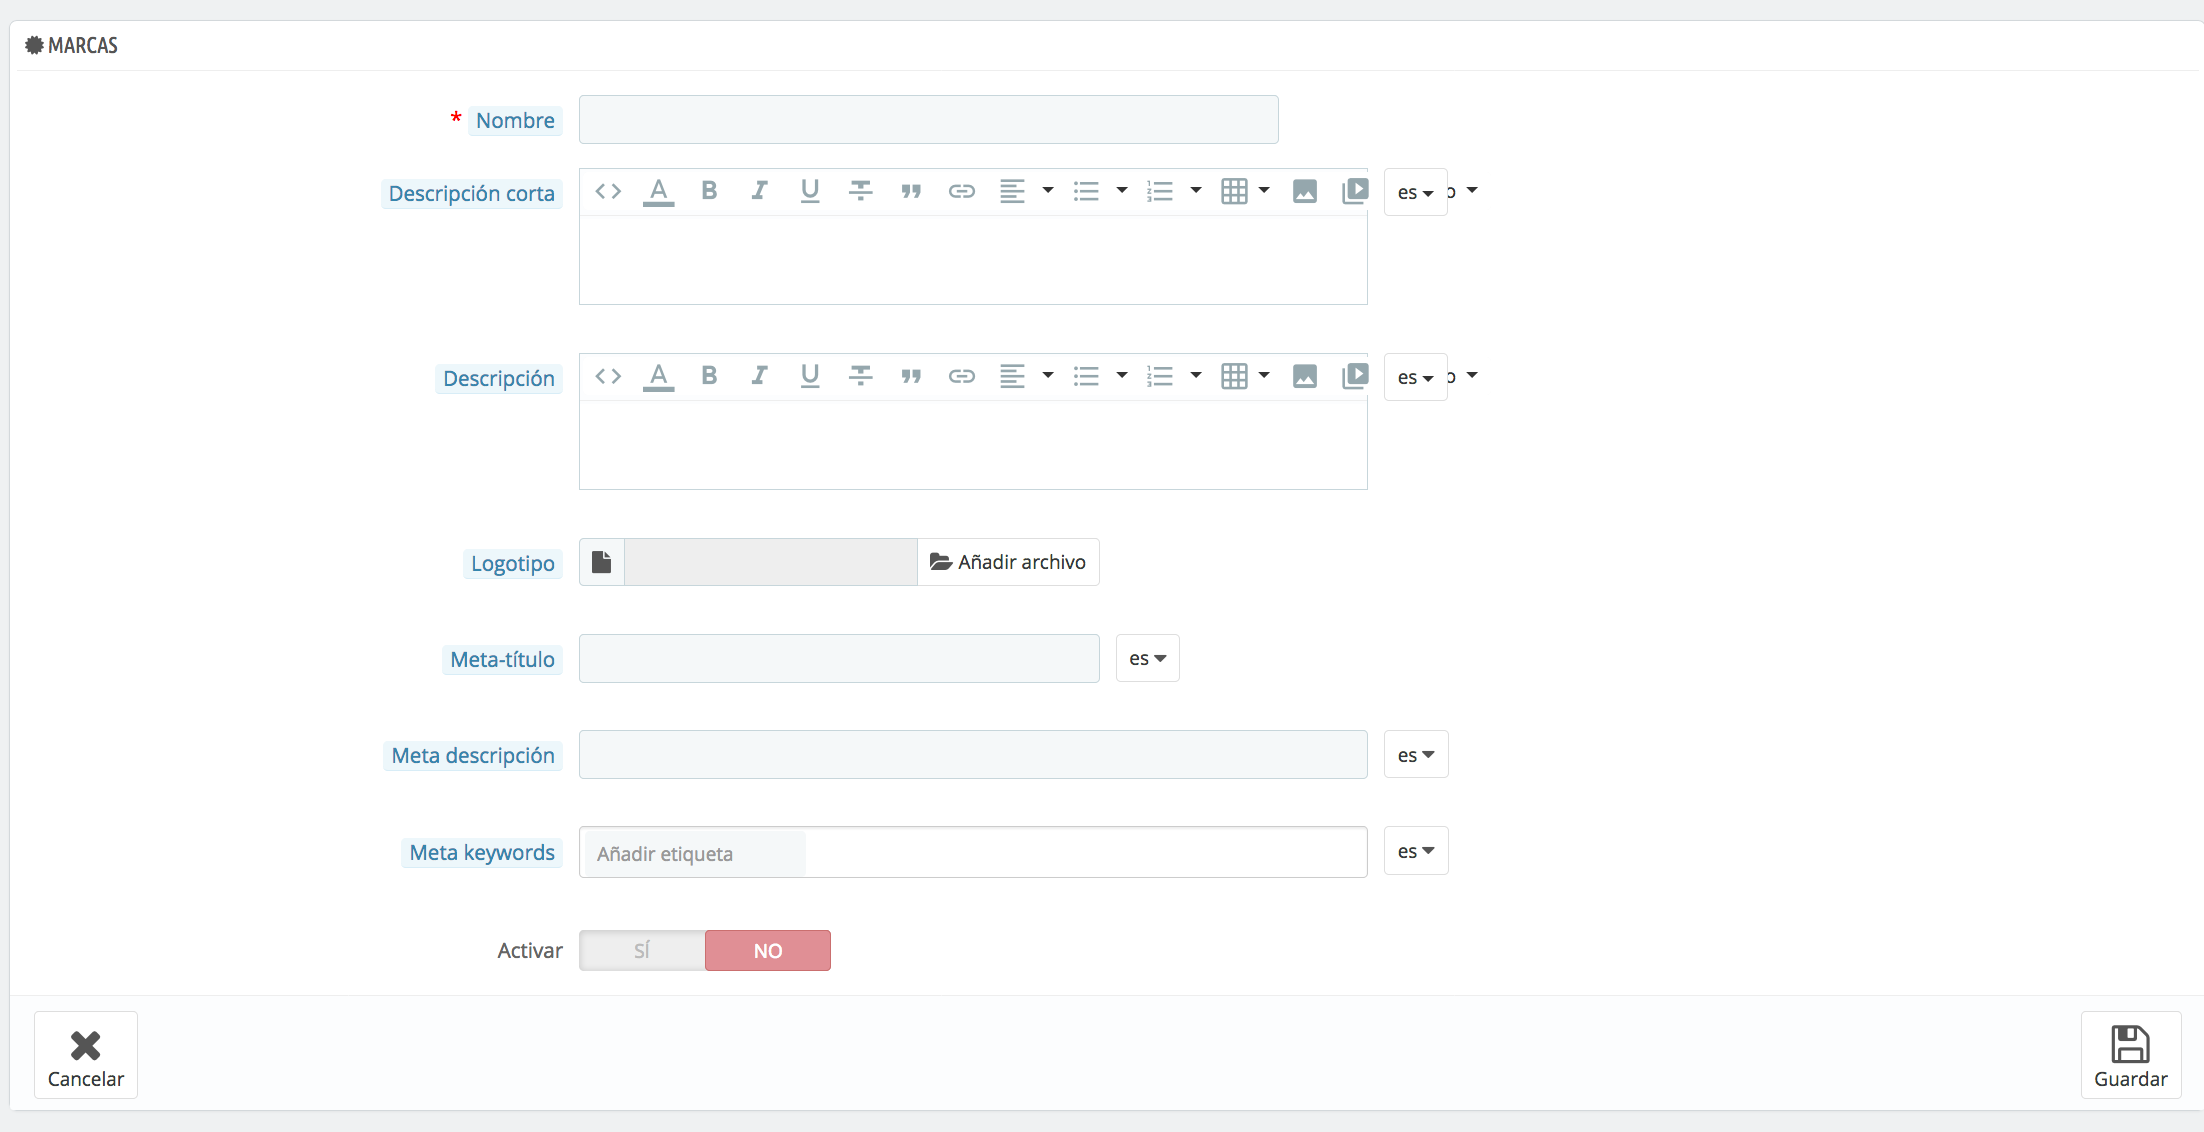
Fill in all the fields:
-Name. Indicates the name of the brand.
-Short description. It is the description that will appear in the search engines.
-Description. Add a more complete description of the mark, activities and products manufactured.
-Logo. You have a brand logo makes it more recognizable and memorable to customers.
-Meta title. The title that will appear in the search engines.
-Meta description. It will be shown in the search results.
-Meta keywords. Key words: so your web site appears in the search engines. You can enter several of them, separated by commas, as well as expressions, which must be indicated in quotation marks.
SEO fields provide the same functionality than it offered in the categories
-Activate. You can temporarily disable a brand. This will only remove it from the list of brands of the front.
Guardian the changes made to the list of brands.

From here, you can:
-Click on the name or logo of the brand, to get a list of all associated products. You can obtain the same result by clicking on the view icon
- Turn off the mark by clicking on the icon of verification of green color which will become a red cross.
View/modify/delete the brand by clicking on the buttons to the right of the row.
Add the address of a brand
At the bottom of the page Brands the section is Directions. Each brand can have its own address registered in PrestaShop. Click on the button Add new address markto open the form of creation.
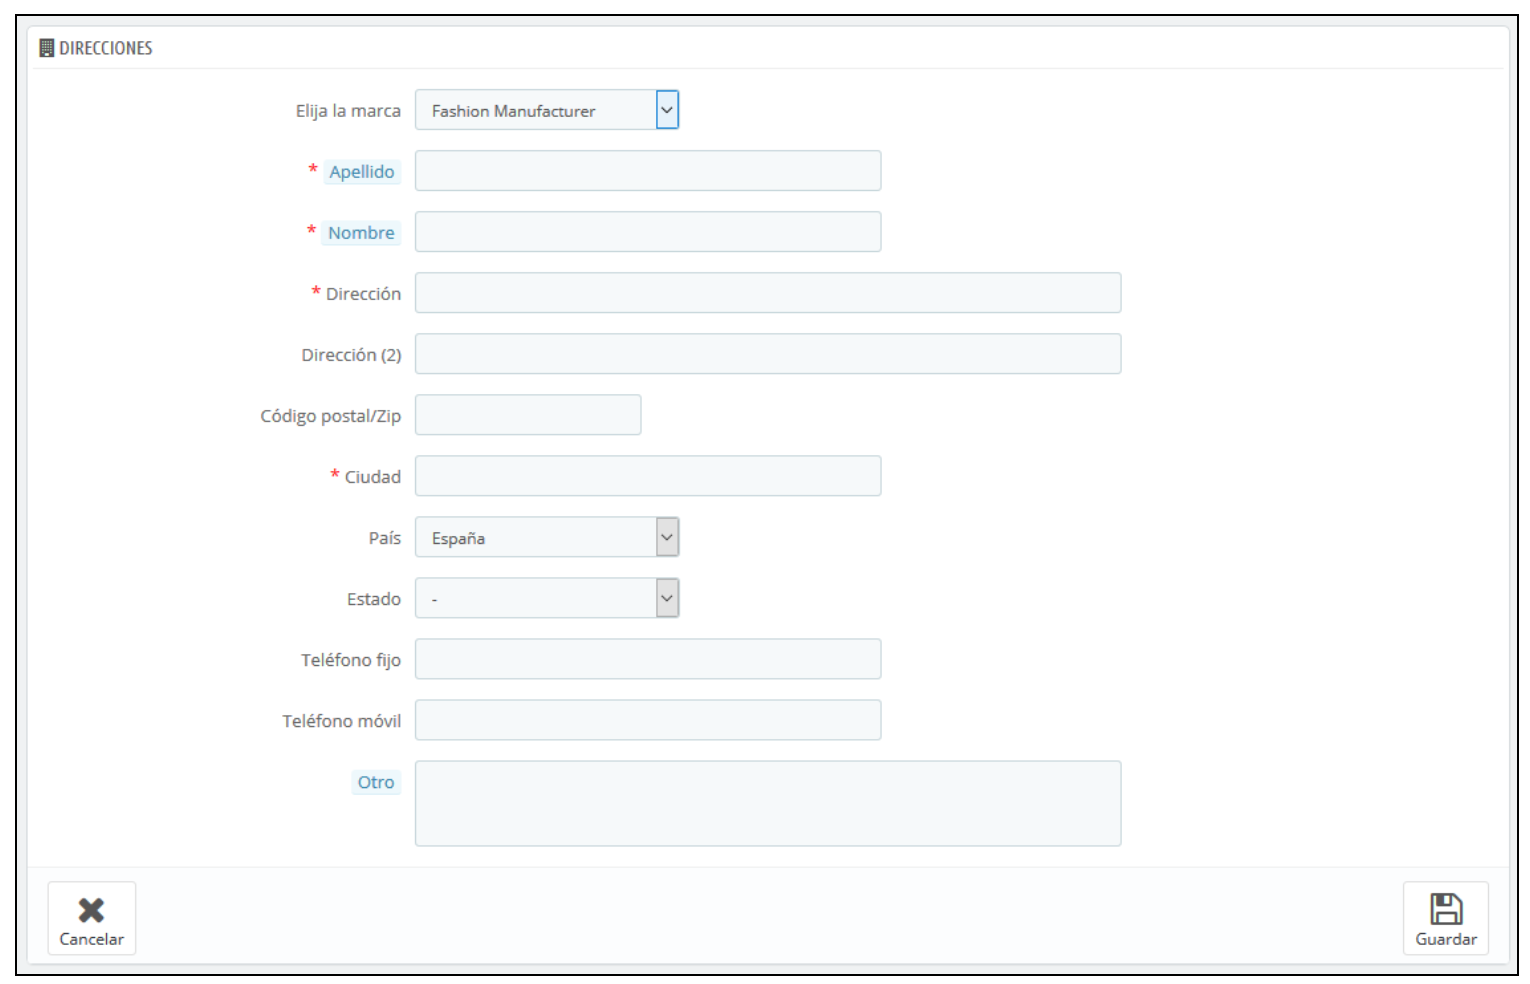
Indicates the brand to your products and comprehensive information
When you've created brands, you can associate them with all the products that belong to it. You have to do is access to Catalog > product and inside tab Basic settings. In bottom window you will see the option of Brands and there you will be able to indicate this.

Add your store providers
As was the case with the manufacturers, customers will have access faster to all products from a single source, which will facilitate navigation for your web site. In terms of positioning, filling these fields you will improve the SEO.
To add a new provider to your store you will have to access to Catalogue > brands and suppliers and inside tab Suppliers. When you have accessed click the button Add new provider or the symbol + within the buttons that appear next to the list of brands. The following form will be displayed:
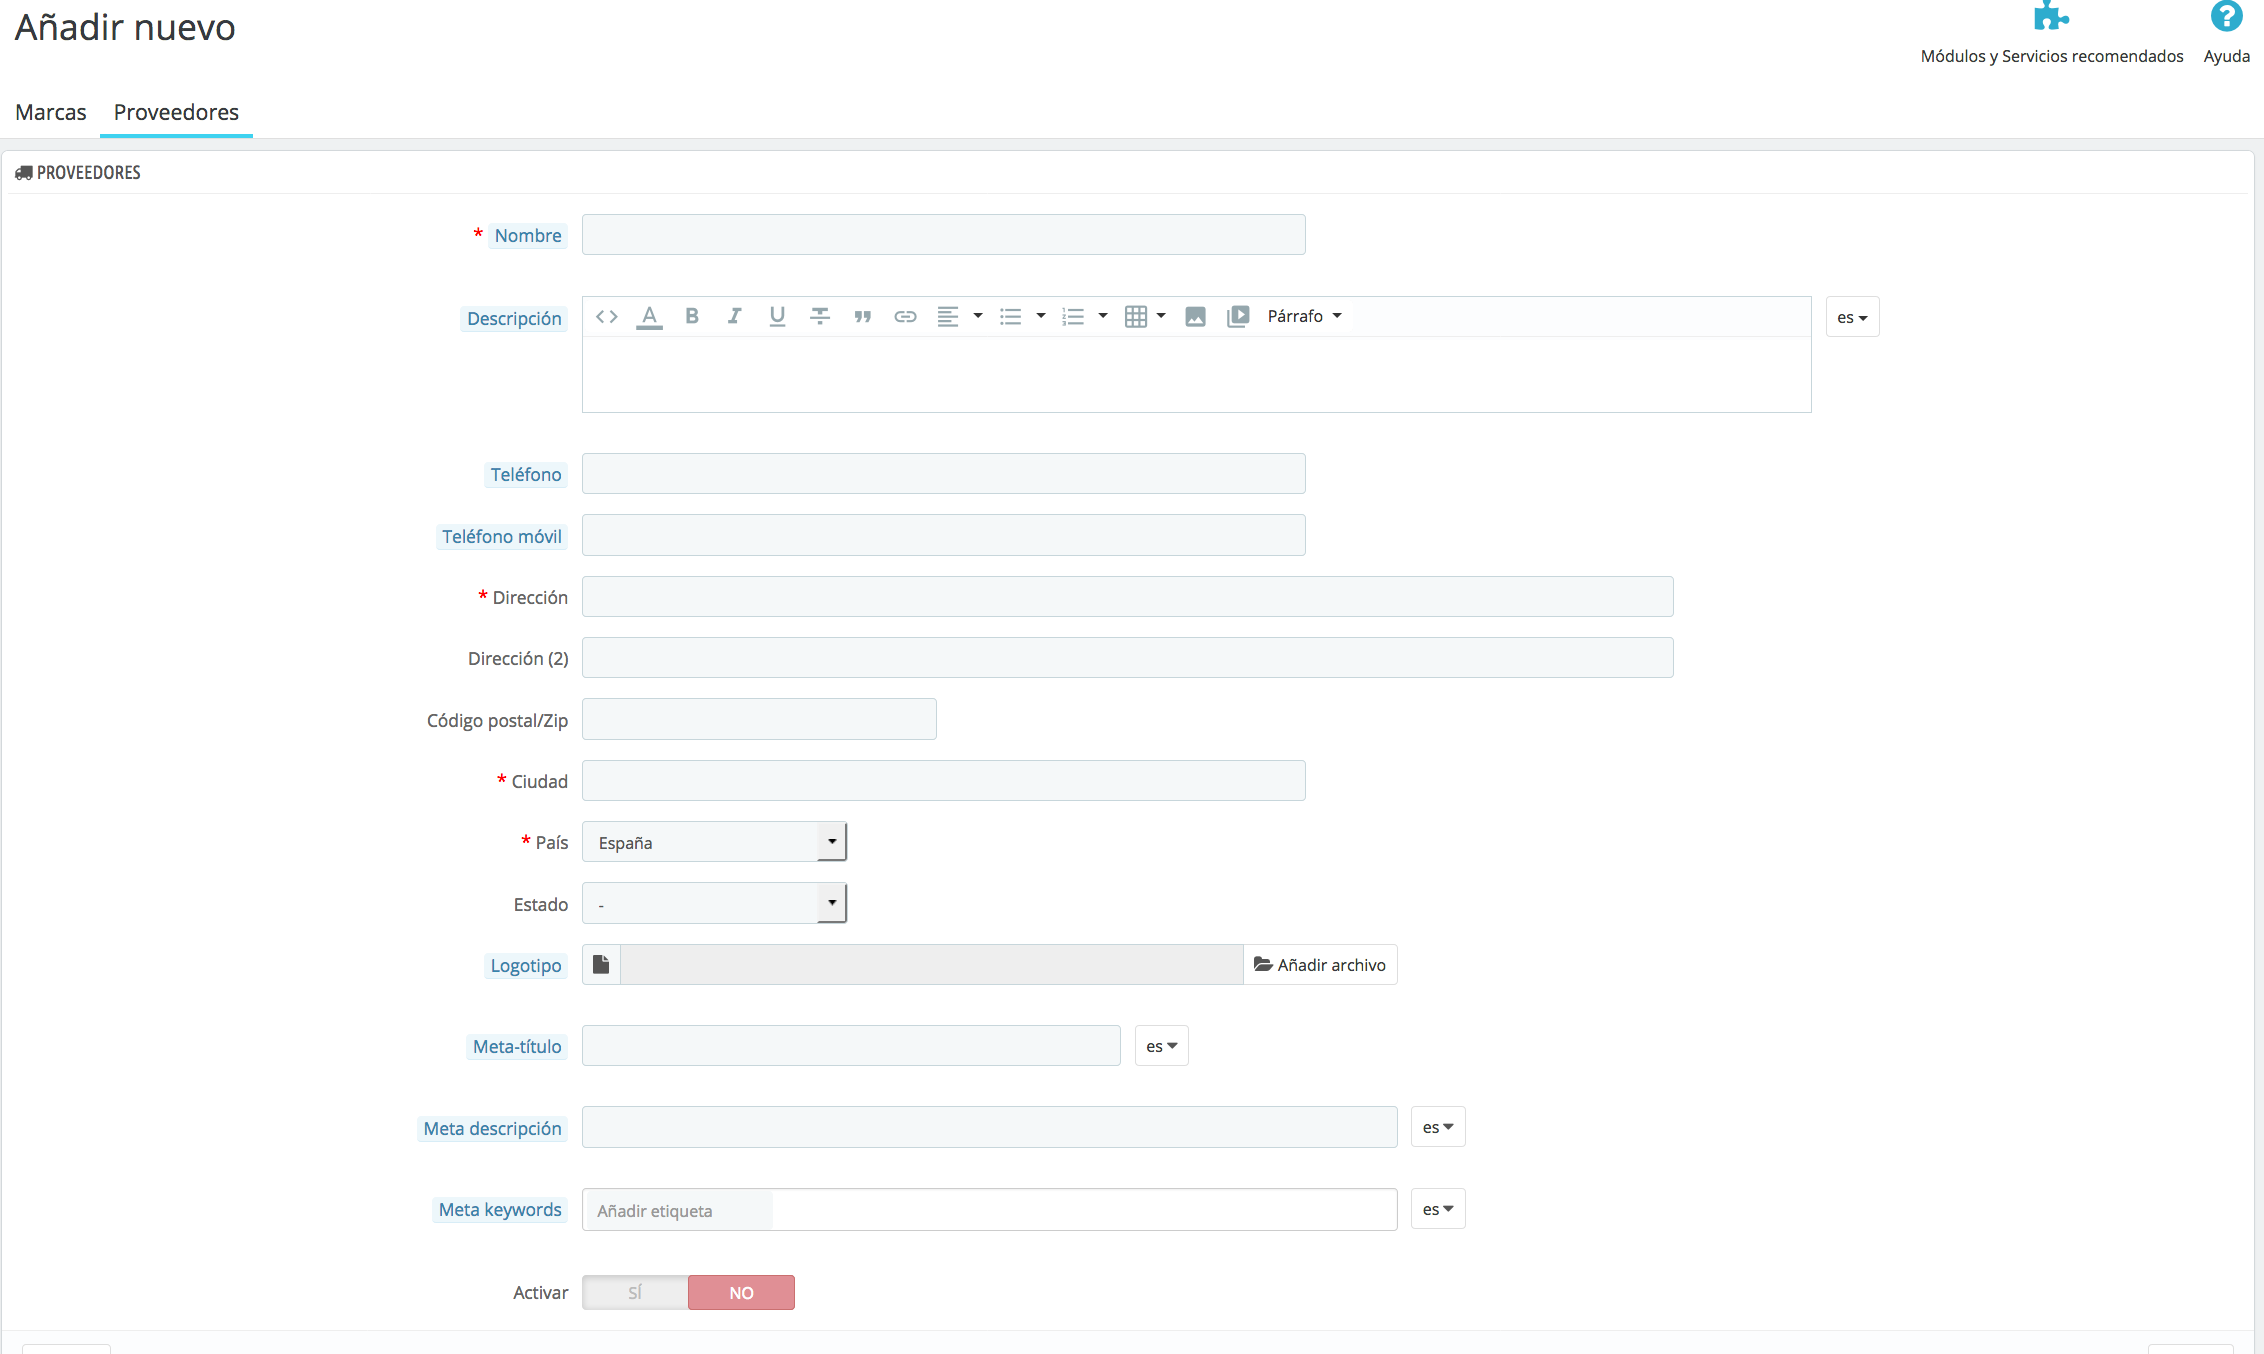
Fill in all the fields:
-Name. Indicates the name of the provider
-Description. It adds a more complete description of your provider, your activity and its products, specialty...
-Logo. Having a logo will help users to identify the supplier.
-Meta title. The title that will appear in the search engines when an application is made by a client.
-Meta description. It presents to your provider. It will be shown in the search results.
-Meta keywords. Key words so that your web site is referenced in search engines. You can enter several of them, separated by commas, as well as expressions, which must be indicated in quotation marks.
-Activate. You can temporarily disable a provider. This will only remove it suppliers of the front-end of your store's listing.
Guardian changes to return to the list of providers.

From here, you can:
-Click on the name or logo of the supplier to obtain a list of all associated products or click the view icon on the right of the current page.
- Disable the supplier by clicking on the green icon. Once disabled, an icon with a red cross.
- View/edit/delete providers by clicking on the buttons to the right of the row.
From the list of buttons that appear at the top of the page of suppliers also are other options:
-Export. You can download the list of all CSV categories.
-Import. Opens the home page Advanced parameters > Import CSV files. Now you can already add information about the supplier product. To access the edit page of the product you want and click suppliers. If the product is combinations, you can also specify the reference of each one of them.
The supplier of each product and organizes your store
When you have created the suppliers you need already, you can assign them to your products. To do this you must Access Catalog > product and access the tab Options. From here you can select the vendor and assign different references, price and currency for each available combination product:
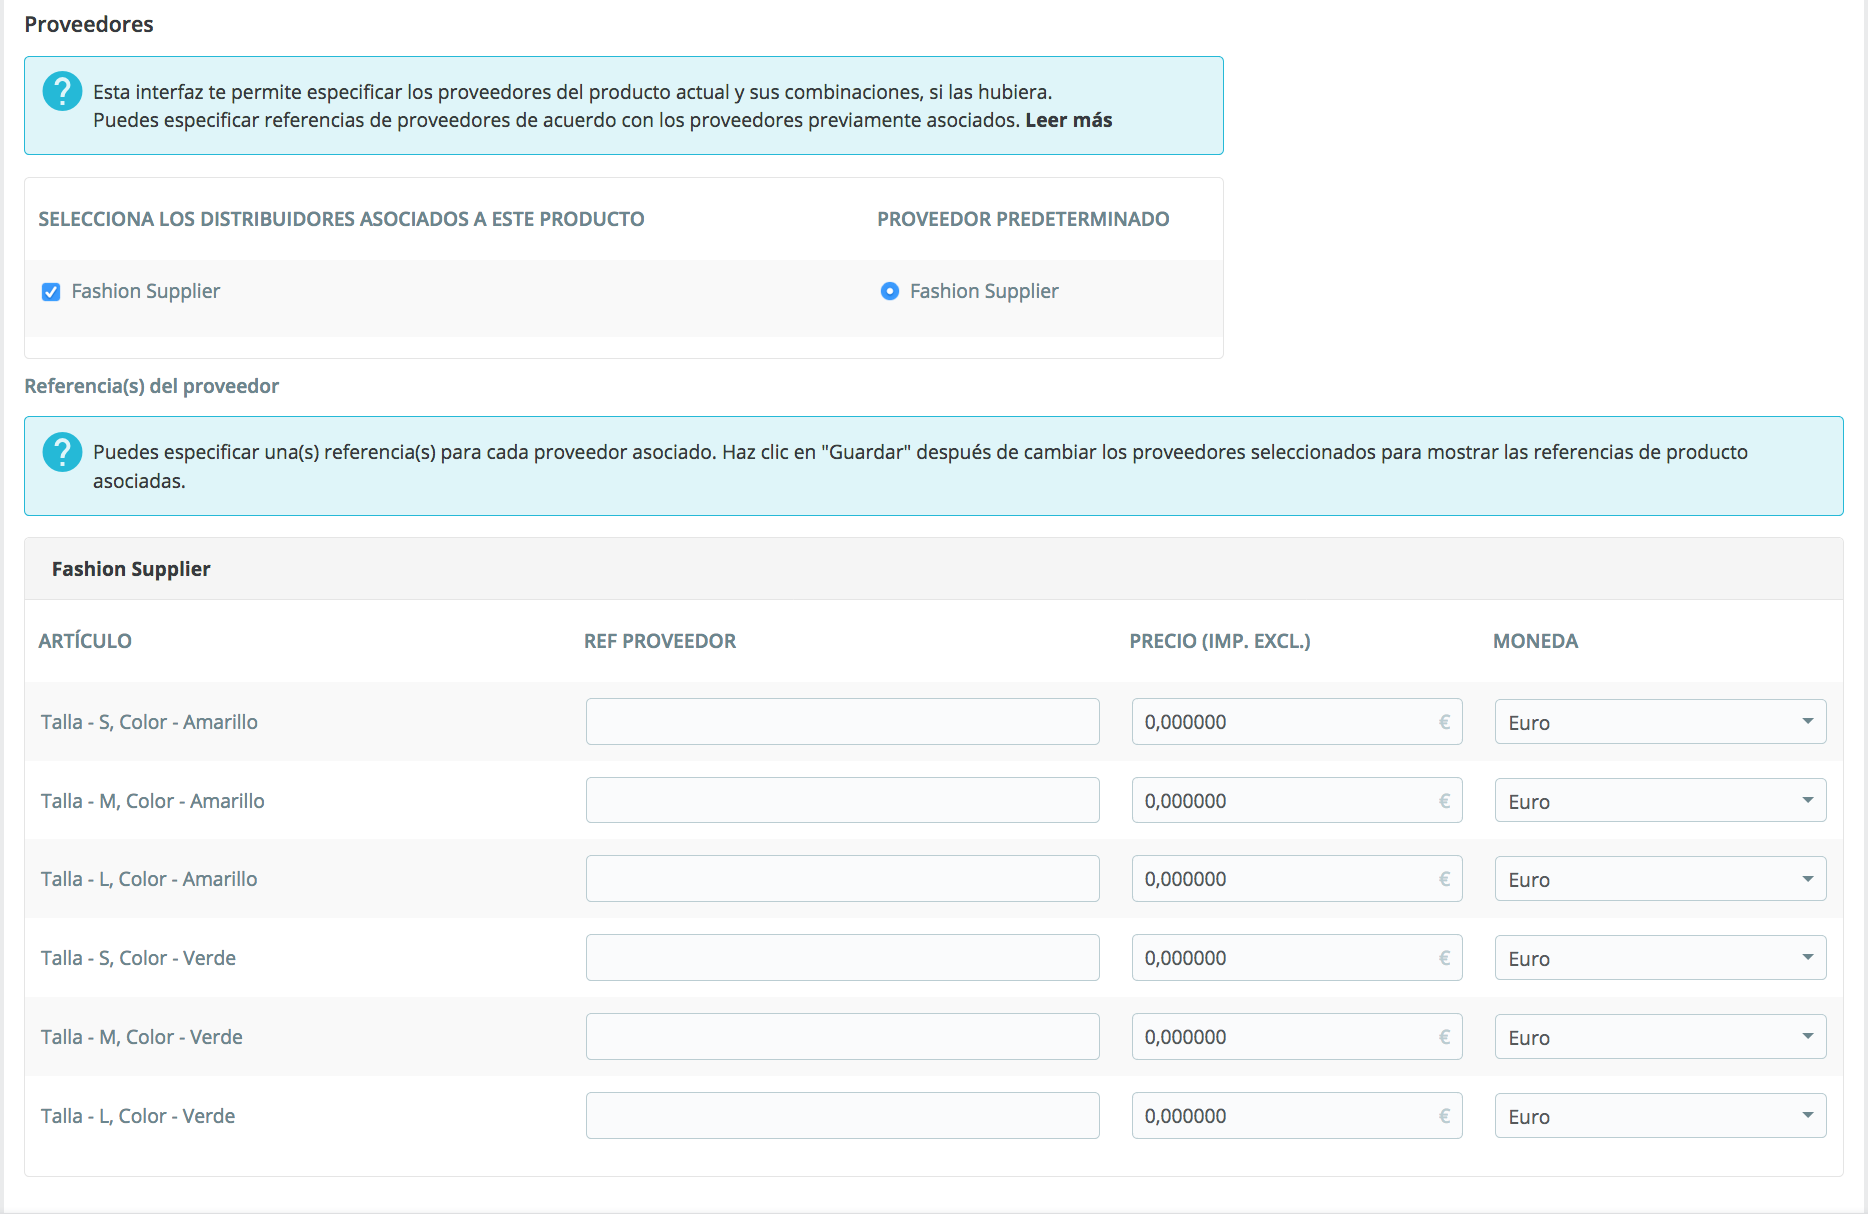
Done this you will have to just repeat the process with all brands, suppliers and products so that your store is completely organized. It is also important to set up the categories of products, so customers will much more easily find what you seek (you can see how to create and associate categories here).
And remember that if you have any questions you can contact us from your client area creating a ticket, by sending an email to acliente@alabazweb.com or by calling 91 874 68 57.









Escribe un comentario