-
 Menú close
 - arrow_forward_iosServices
- Services arrow_back_ios
- arrow_forward_iosDeveloped by PrestaShop
- arrow_forward_iosPrestaShop made to measure
- PrestaShop made to measure arrow_back_ios
- Custom PrestaShop modules
- Customizing PrestaShop modules
- Creation of PrestaShop
- arrow_forward_ioshosting Prestashop
- hosting Prestashop arrow_back_ios
- Hosting for PrestaShop
- Google cloud for Prestashop
- Hosting consulting services
- arrow_forward_iosMarketing and advertising
- Marketing and advertising arrow_back_ios
- SEO for prestashop
- SEM for PrestaShop
- Promotion
- Basic plans
- arrow_forward_iosAddons from PrestaShop
- Addons from PrestaShop arrow_back_ios
- arrow_forward_iosProduct Page PrestaShop Modules
- Product Page PrestaShop Modules arrow_back_ios
- Personalised products
- Reservations and rentals
- Sale of tickets
- Management of taxes on products
- arrow_forward_iosPrestaShop Modules for Logistics and Transportation
- PrestaShop Modules for Logistics and Transportation arrow_back_ios
- Personalisation of shipments
- Click & Collect
- arrow_forward_iosPayment
- arrow_forward_iosStore management
- Store management arrow_back_ios
- Utilities
- Taxes
- Customer Support
- Importers/exporters (Dropshipping)
- Best sellers
- arrow_forward_iosTypology
- Hour bonuses for PrestaShop development
- Mantenimiento PrestaShop
Buscar productos...
Ctrl+K
0
Steps to create areas and carriers in PrestaShop 1.7
The buying process does not end when the customer completes in order in your store, it is necessary to receive the product in your home, in the established time and in perfect condition. Therefore, correctly configure the carriers and the areas where it operates each is indispensable to have satisfied customers. In this post we tell you the steps you must follow.
Actualizado: 28/03/2018
13037

Compartir:
Create new zones in PrestaShop 1.7
The steps for PrestaShop 1.7 zones are very similar to those who had followed in previous versions, but the menu has changed a bit. In 1.7, to create zones will be necessary in the tabs menu International > geographical locations.

We will access a window where we can see three tabs with the countriesthe areas and the provinces default PrestaShop. First let's see the countries:

PrestaShop now includes countries in its database. But in the event that for any reason you need to add a country you have to do is click on the button Add new country being in the top-right corner of the screen. The following window will appear:

-Country. Indicates the official name of the country in all languages.
-ISO code. The ISO-3166 country code. You can find it on the official website of own ISO: http://www.iso.org/iso/country_codes/iso_3166_code_lists/country_names_and_code_elements.htm.
-Phone code. The international phone code of the country, which you can find here: http://es.Wikipedia.org/wiki/anexo:Prefijos_telef % C3% B3nicos_internacionales.
-Default currency. You can use the default currency of your shop (established on the international page > location), or any of the other currencies installed.
-Zone. Indicates the sub-region in the world (continent) that this country is United. Then we will see how to create zones.
-Need this country postal/Zip code?. Indicates if users in this country have to write your zip code or not when they register at your store.
-Format of the Zip/postal code. Indicates the format that must have the postal code.
-The address format. Indicates how you should add the address. You can click on the different help links located on the left side of the text field to add more fields.
-Active. A disabled country not shown as an option when a visitor register to create a new account.
-It contains States or provinces?. Indicates whether or not the country has "States". This option adds a field to the form of creation of PrestaShop addresses. Keep in mind that the "States" can be regions, provinces,... depending on the country.
-Need this country tax identification number?. Not all countries require this type of identification. Check with the tax authorities of the country.
-Display the label of tax (for example, "taxes incl."). Choose whether it should be displayed next to prices or not.
-Partner stores. You can make sure the country is only available for a selection of your stores.
Once you have created all the countries you need will set up the areas. Areas, where will appear the following areas created by default have to now access the tab:

If you need it, you can create more areas by clicking on the button Add a new zone and you will see the form of creation.

You only need to indicate a name and Stateto indicate for example that deliveries are not made in America. If you have set the multi-shop mode, you can also associate an area with a selection of shops.
In this case we can create a zone called Canary Islands to establish after different cost of shipments to that specific area.

This is done we can begin to configure the provinces/States that you receive different names depending on the country. PrestaShop 1.7 already contains by default the provinces of countries (including Spain), so it will not be necessary to add them manually.
To create a new province or State click on the button Add new State to open the form of creation.

-Name. The name of the State or province. It will be displayed on invoices and in the package.
-ISO code. The ISO-3166-2 code of the State:
1. go to the following page: http://es.wikipedia.org/wiki/ISO_3166-2
2.-beam click in the two letter code of the State, the entry in the table column.
3. it will open a page where you can check the status code.
4. When you find it, deletes the prefix of the country with the purpose of obtaining one less than 4 character code. For example, the ISO complete code for Madrid, ES-M. Just use "M" as ISO code and link this State to the corresponding country using the list of Country.
-Country. Indicates the country to which he belongs this State or province.
-Area. It indicates their geographical area using the drop-down list.
-State. A disabled state is not suggested as an option when a visitor register to create a new account.
As we have created a new area for the Canary IslandsWe will have to access the corresponding province, in this case Las Palmas, and associate it with the area that we have created. For that we are looking for the province in the list and click on modify:

In this way you can apply a cost to transport to the Canary Islands with regard to the rest of Spain.
Add and configure a new carrier in your PrestaShop 1.7 shop
We will now proceed to configure carriers and shipping costs. Have access to Transport > transport:

Once we have agreed, we will have to click on Add new carrier and we will begin to complete all the information requested in the different steps:
General parameters:
-The carrier name: Indicates the name of the carrier.
-Transit time: Specifies the time that takes to deliver the package
-Degree of speed: This data is used to include the time that can be delayed for an order, with 0 being the longest and 9 the shortest. (It is not necessary to indicate this.)
-Logo: Here you may upload lal image that represents this carrier.
-Tracking URL: Indicates the url of the carrier tracking. In this way the user can consult on what state your order, is the day of delivery, etc. Remember that you have to replace the id of the order by @ so is automatically replaced by the id uparticular order n.

Place and shipping
-Add handling costs: Indicates if in case that you want to include a cost for packing, packaging costs... Shown in Transport > preferences and it is the same for all carriers.
-Free shipping: Indicates if in the case concerned a free carrier.
-Turnover: Here you can indicate whether the cost of transport depends on of the weight of the package or order cost.
-Taxes: Indicates which taxes affect this carrier. It is important to have in mind that such fees will be added to the price that you specify later in the ranges.
-Out of the range of behavior: When order does not meet the ranges, because their cost is lower or higher or exceeds the weight shown, you can choose between disable the carrier either apply the higher cost.
-Ranges: You can create ranges by weight or cost of the order according to what you have indicated in the billing. You have to indicate ranges between greater than or equal to (> =) and the less than or equal to (< =) and the cost in the desired areas, for example, if the cost of the order is between 0 and €29.99, the customer must pay €6 + VAT shipping in Spain and €8 + VAT in the Canary Islands.
Then you can create more ranges between 30 and 50, 50 and 100 euros, between 100 and €250... you need.
If you need that a shipping is free only for a zone or in a particular range, simply to indicate that the cost is of €0.

Size, weight and access group
-Height, width, depth and maximum weight of package: Indicates the maximum limits of the measures and the weight of a package for the carrier. In other words, here you must indicate if this carrier does not carry bundles of more than 15 kg or more than 50 cm of width, etc.
-Group access: Indicates which groups of customers will be available this carrier and what not.

-Overview: You can view the information that you've configured in this last tab and enable or disable the carrier so that it is available in the front.
It is also possible to configure certain Preferences. This will require access to Transport > preferences.

-The costs of handling and management: Refers to the costs of handling that we have indicated in the General parameters of the carrier. If you indicate Yes the price listed in this section will be added to the shipping cost. You have to take into account that it will be the same for all carriers. It refers to the costs of handling and management before delivering the package to the carrier.
-Free shipping starting from: You can configure the free shipping based on weight and price, but you should keep in mind that these data will be for all carriers. If you don't want to offer free shipping leave these values at 0.
-Carriers default: Indicates the carriers that will be displayed by default in your store.
-Sort by: You can choose how you want to be ordering carriers in the front office, either by price or by position. Select by: you can indicate if you want the order is ascending or descending according to the previous option.
Set the carrier of all your products
When carriers have created and established the options you can proceed to add the carrier on each product. Enter to Catalog > product and inside tab Transport and this options screen opens.

Here you have to indicate the measures of package, weight and if you have additional shipping costs. Then only should brands available carriers. If you do not select any carrier all are available.
Now you only have to perform this step with all carriers and products you need.
If you have any questions you can get a ticket from your client area of alabazweb.comsend an email to [email protected] or by calling 91 874 68 57.
-
 Improvements for your Prestashop store Botón de desistimiento obligatorio desde junio de 2026: Qué dice la ley y cómo cumplir en PrestaShop
 -
 PrestaShop Training and Support Comparativa práctica: los mejores módulos para PrestaShop según tu tipo de tienda
 -
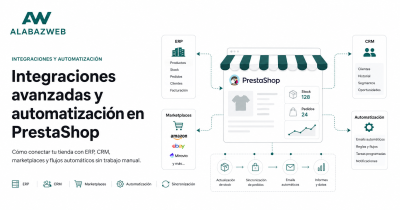
 PrestaShop Training and Support Integraciones y automatización en PrestaShop: conecta tu tienda con tu negocio
 -
 Prestashop custom programming Cómo elegir expertos en desarrollo de módulos a medida para PrestaShop
-
 Improvements for your Prestashop store Tu tienda no se va de vacaciones: checklist pre-agosto para PrestaShop
 -
 Improvements for your Prestashop store Cómo mejorar la velocidad de tu tienda PrestaShop (y por qué importa para vender)
 -
 PrestaShop Training and Support Integraciones y automatización en PrestaShop: conecta tu tienda con tu negocio
 -
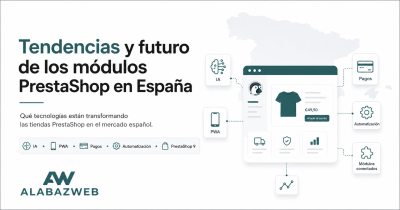 Improvements for your Prestashop store Tendencias y futuro de los módulos PrestaShop en España
-
 Improvements for your Prestashop store Boost Your PrestaShop Store with a Chatbot: The Ultimate Solution to Improve Customer Service
 -
 Improvements for your Prestashop store SOLVED: Redsys has not recorded my store payments since May 30
 -
 Improvements for your Prestashop store The success of Materiales de fabrica thanks to Megaproduct
 -
 Improvements for your Prestashop store What happens when you can't update Prestashop?
Escribe un comentario